How to Install Laminate Flooring on Your Own (DIY)
Dec 9, 2019
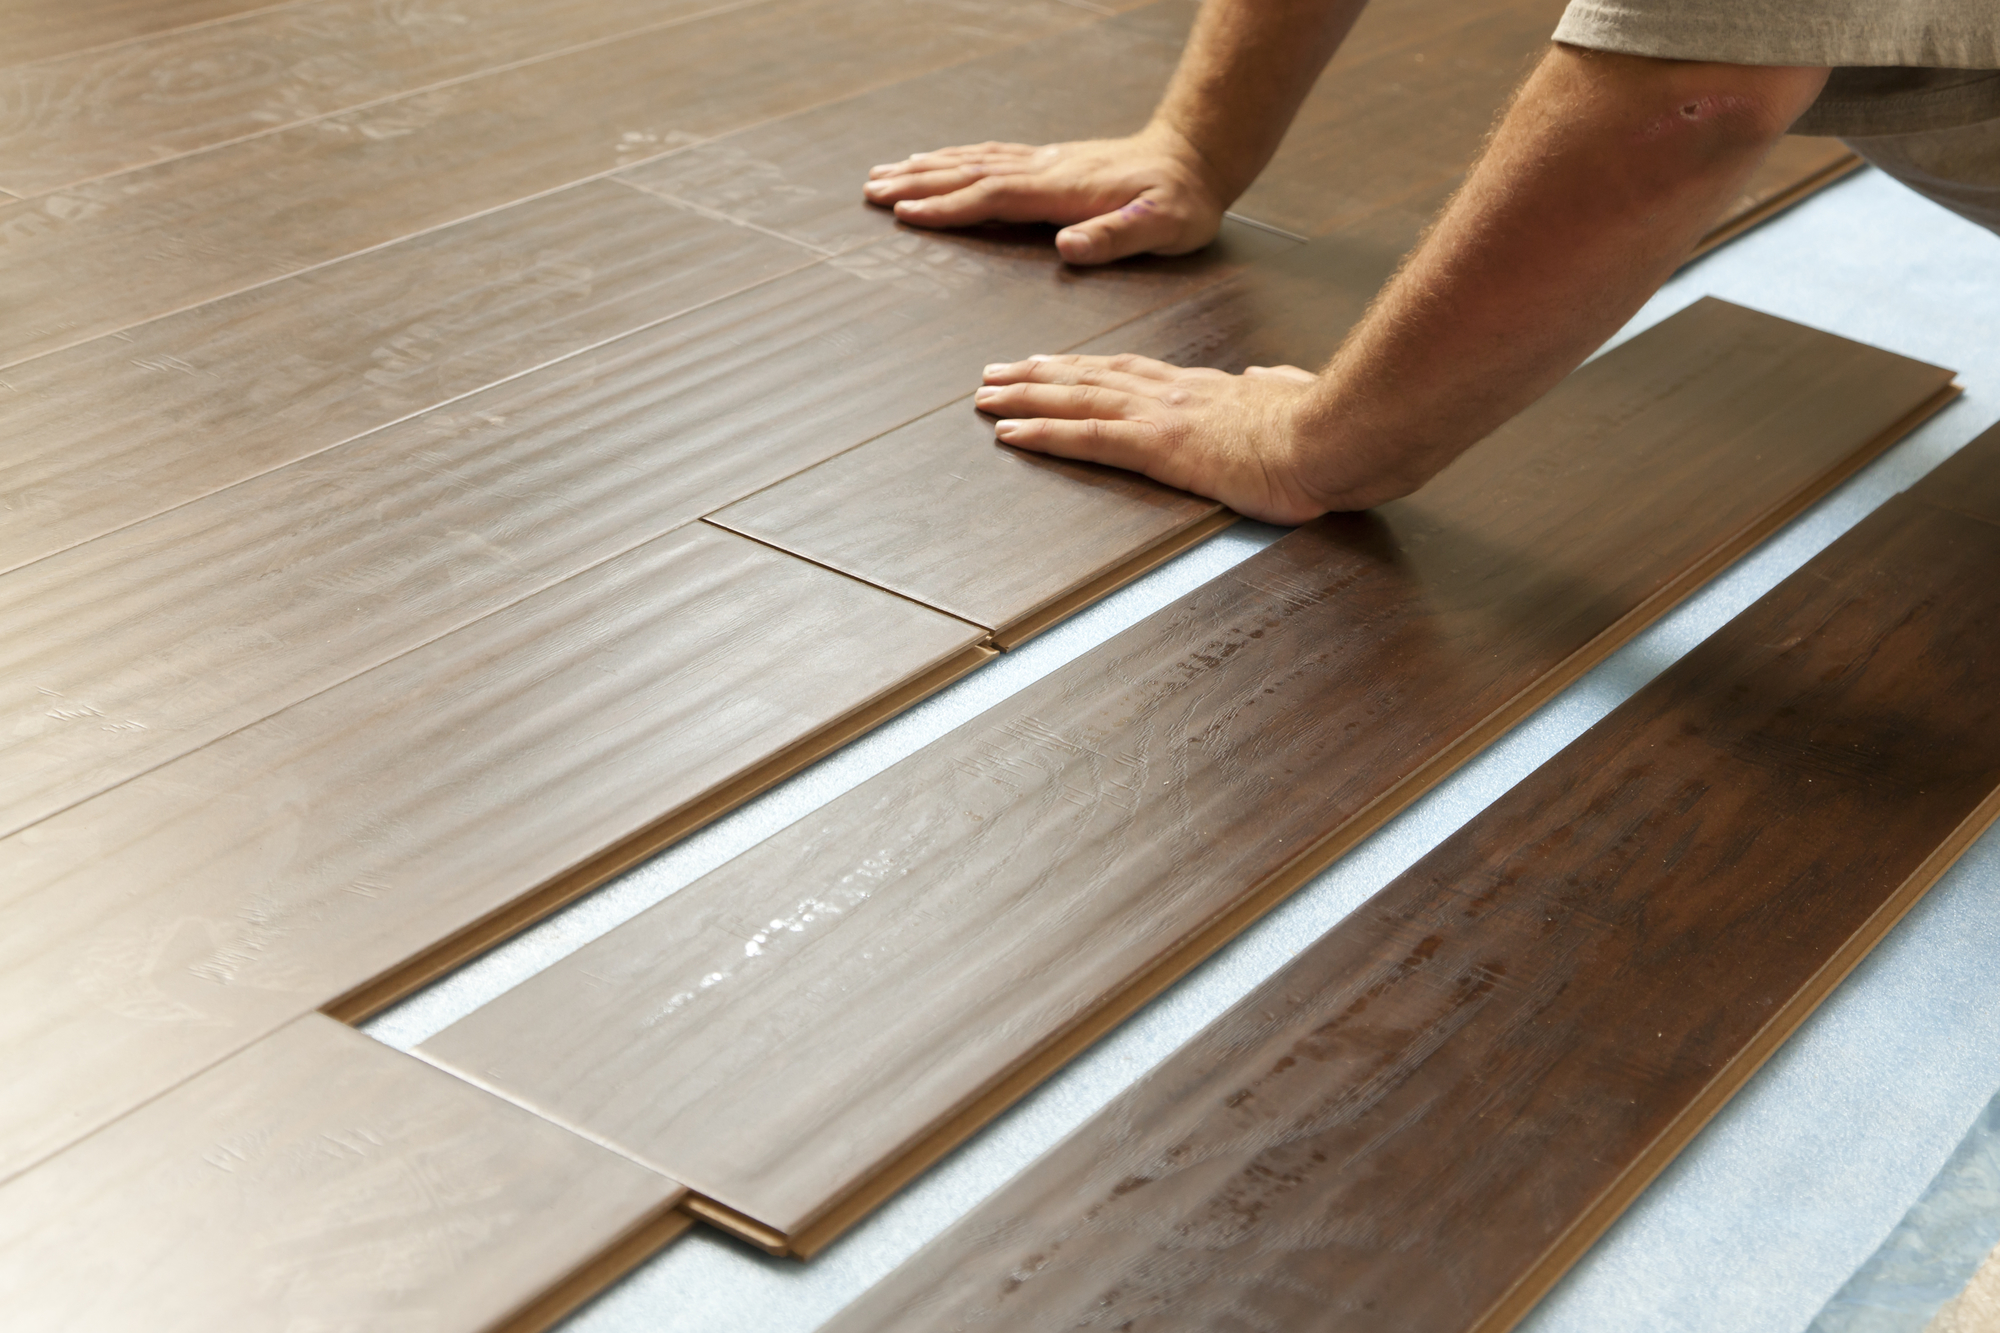
Table of Contents
Click below to jump to a specific section
How much can I save by installing my floor myself?
The current going rate for laminate flooring installation (as of Jan. 2019) is approximately $1.75/sq. ft. Calculate that rate with the square footage that you’re wanting to cover and you’ll probably be surprised how quickly it can add up. Choosing to install laminate yourself for a 150 sq. ft. room may save you between $250-$300.How long does it take to install laminate flooring?
The answer to this question obviously depends on the scale of your project as well as your pace while doing it. However, most jobs can be turned into a rather quick weekend project. Get the whole family involved to significantly speed things up.General Tips for Installing Laminate Flooring Yourself
Chances are you haven’t done this before, so don’t get frustrated at the start. Once you get going, you’ll start to get the hang of it, and it will become much easier. Relax and have fun with it. You’re making a beautiful, comfortable, and financially smart addition to your home!What supplies do I need to buy?
As you might expect, you need a few more supplies than just the laminate itself. You should also be sure to pick up underlayment (a.k.a. underflooring, cushion, moisture barrier), transition strips, and either baseboards or quarter-rounds. Don’t forget you will need a few hand tools to complete the job as well.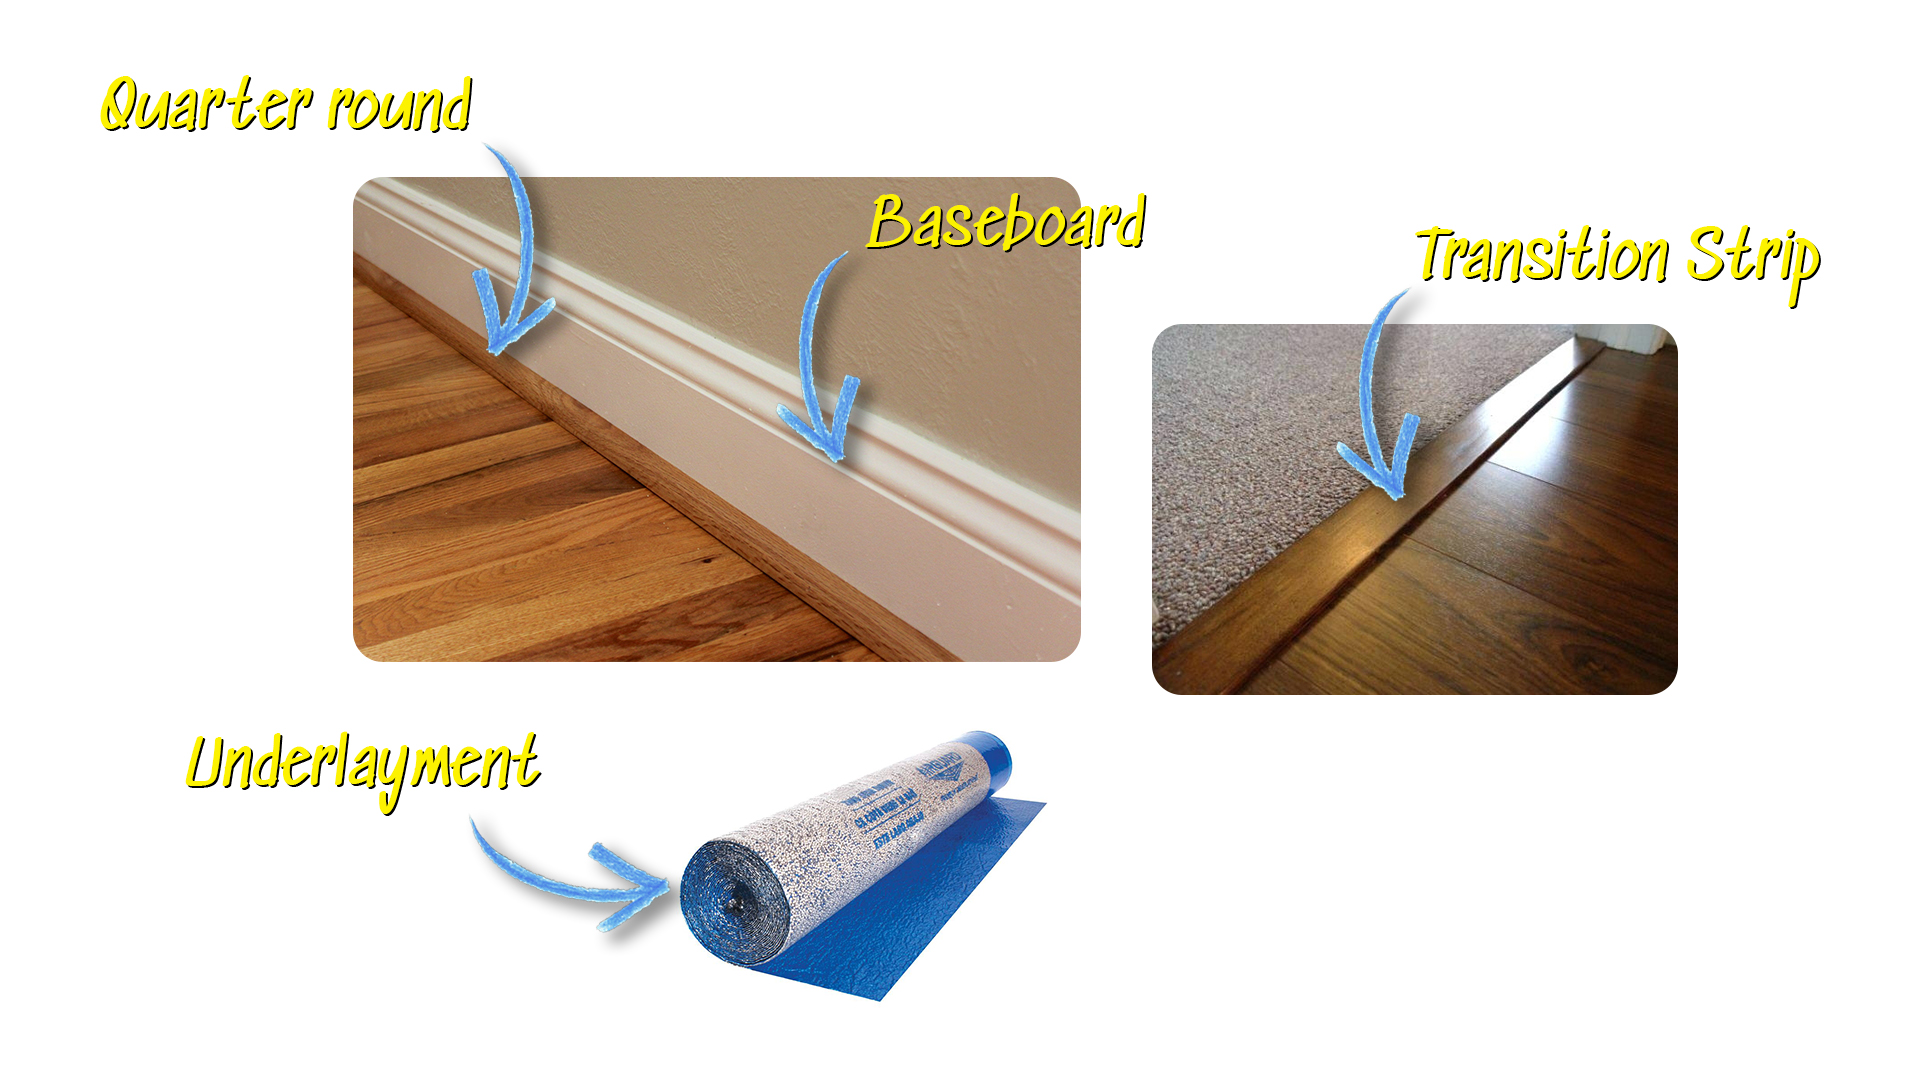
What tools do I need to install flooring?
Here’s a list of everything you’ll need to make installing your new laminate flooring as easy as possible:- Tapping Block
- Pull Bar/Pry Bar
- Spacers (refer to laminate manufacturer’s suggested size)
- Measuring Tape
- Rubber Mallet
- Carpenter’s square
- Chalk line
- Knee pads
- Utility knife
- Level
- Protective eyewear
- Dust mask
- Laminate Flooring Cutter or Miter Saw

Tips on purchasing laminate flooring
How much laminate should I purchase?
We generally recommend buying 10% more than the total square footage of laminate needed to cover the areas for flooring. Total square footage can be found by multiplying the length by the width of the room or area in feet. During the installation process, you’ll be cutting the laminate to fit up against your wall and door jambs; this means that not all of the planks will fit perfectly, and you will have leftover pieces of scrap laminate from your cuts. For jobs with a diagonal or herringbone pattern, we recommend using around a 15% waste factor. This is because every piece of laminate that touches the wall/door jambs will need to be cut and this creates a higher waste factor.Why do I need an underlayment/cushion?
Underlayment (a.k.a underflooring, cushion, moisture barrier) is an absolute necessity when laying your new laminate flooring. Typical subfloors consist of either concrete or plywood on stilted construction. Adding an underlayment cushion with a moisture barrier to your laminate flooring provides the following:- Maintains Warranty – installing laminate without underlayment will void your manufacturer’s warranty
- Creates Moisture Barrier – protecting your flooring from moisture that naturally rises from the concrete/wood subflooring below
- Reduces Noise – sound deadening your flooring so that it doesn’t create reverberated noise from the two hard objects (laminate and subfloor) grinding/knocking together when you walk
- Softer underfoot – underlayment’s padded quality absorbs more shock while you are walking throughout your home
- Longer product life – preserves your flooring over time and allows for a significantly longer lifespan
What are transition strips?
Transition strips are what you place in between your new flooring and where it meets with pre-existing flooring, step downs or exterior doorways. Not only does it create a cleaner visual between different flooring types and doorways, but it also leaves room for the natural expansion and contraction of the laminate flooring. When laminate is installed next to the wall, you can cover it with a baseboard or a quarter-round as discussed further in this article.Do I need to remove my baseboards when installing flooring?
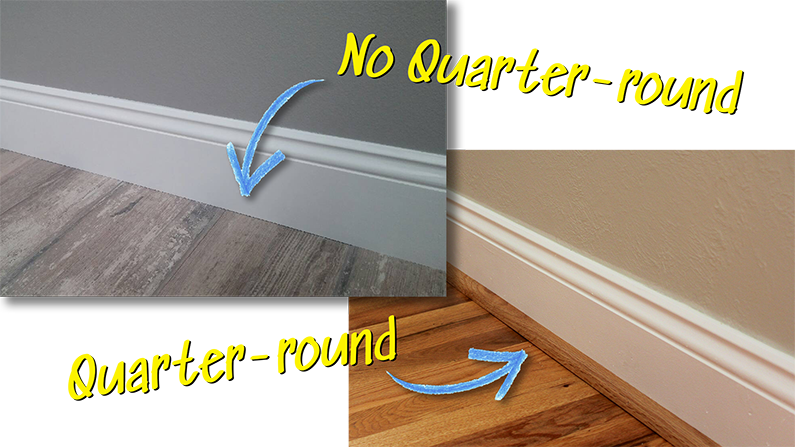
When you install your laminate flooring, you must make sure to leave an expansion gap between it and your walls to allow for expansion and contraction (please see manufacture’s recommend expansion gap size). Obviously, a gap in between the flooring and your walls isn’t the most aesthetically pleasing look. To cover this gap, you can install your baseboards (new or previously used), quarter round or shoe moldings on the bottom of your walls. You have three options when it comes to the status of your baseboards while installing your new laminate floor:- Option 1: Carefully remove your existing baseboards and save them to reinstall after you’ve replaced your floors.
- Option 2: Remove your baseboards and install new ones after you’ve replaced your floors. Most commonly, homeowners will replace them with a slightly higher baseboard to cover previous indentations and for an updated look.
- Option 3: Keep the baseboards on while you install the new floors and add a quarter-round after to cover the expansion gap in between.
IMPORTANT: Acclimate your laminate
Laminate flooring is naturally prone to expansion and contraction with sudden changes in temperature. Typically, the warehouse or store that you get your flooring from is going to be a different temperature than your home. So, it’s vitally important to acclimate your flooring to your home for at least 48 hours before beginning your project. Simply leave the flooring in the boxes in an out-of-the-way location inside your home for these two days to allow for the expansion or contraction of the flooring, and then you’ll be ready to go with no issues in the future.Which way do I lay my laminate floors?
There’s no right or wrong way to lay your laminate floors. You can do it any way that you’d like. However, the most common way is to run the planks parallel to the longest wall in the room or parallel to the largest main window in the room. This also often correlates with running the planks in the direction that you walk when you enter the room or the length of the room. Don’t forget that diagonal patterns are also an option, but remember to buy additional laminate for a greater waste factor, typically 15% more than the actual dimensions of your room.Shop Our Wide Selection of Laminate Flooring
Browse our selection of laminate flooring.
Shop Our SelectionSteps and Tips to Install Laminate Flooring
1: Measure the area
Before coming into our store to purchase your favorite laminate style, measure the area of your home where you want to install it. Get as precise a measurement as you can, and be sure to account for doorways and closets if the flooring is going into different rooms of your house. Also make sure to take linear feet measurements if quarter round, shoe molding or replacement baseboards will be purchased. You will also want the linear feet distances where any transitions will be placed (T-Molds, Thresholds, Reducers, and Stair nose).2: Purchase the laminate, underlayment, transition strips and supplies needed
Visit our showroom, and one of our flooring experts will help you review your measurements and answer any questions you may have. We will also happily prepare a quote showing all product cost broken down for your review and approval.3: Let the flooring acclimate for 48 hours
Laminate flooring is naturally prone to expansion and contraction when exposed to different temperatures. The warehouse that your flooring is shipped in from is undoubtedly a different temperature than your home, so it’s extremely important that you give the laminate time to adjust. If you don’t take the time to allow your laminate to acclimate, your flooring will likely expand and create bumps and ridges. Laminate with insufficient room may risk “teepeeing” & damaging your floor4: Tear up your current flooring and remove baseboards (optional)
You have a few different options when it comes to the state of your baseboards during the installation process. It’s simply an aesthetic choice, so pick whichever option suits your style the best.- Option 1: Carefully remove your existing baseboards and save them to reinstall after you’ve replaced your floors.
- Option 2: Remove your baseboards and install new ones after you’ve replaced your floors. Most commonly, homeowners will replace them with a slightly higher baseboard to cover previous indentations and for an updated look.
- Option 3: Keep the baseboards on while you install the new floors and add a quarter-round or Shoe molding after to cover the expansion gap in between.
5: Clean your subfloor
Before you start laying anything down, take a broom and dustpan and sweep the entirety of the area that you’re going to be working on. An industrial-sized vacuum or Wet-Dry works best for faster clean up. This will help keep your underlayment as healthy as possible and make working on the floor significantly easier throughout the entire project.6: Lay down all underlayment first
The underlayment is just as important as the flooring itself. It protects your new investment from moisture and damage from the cement slab underneath. Lay it across the entirety of your work area in the horizontal direction from which you’ve chosen to install your laminate with the moisture barrier side down against the subfloor.7: Start laying the laminate floor, cutting the pieces as you go
Once you’ve decided on which way you’d like to lay your laminate, it’s time to start laying it down. We also recommend opening several boxes at a time and dry laying the laminate first. Put spacers along the wall to create a small gap between the laminate and the wall (refer to manufacturer’s requirements) to allow for expansion gap. Select a starting corner of the room and work from left to right putting down one piece at a time, interlocking the pieces together as you go. For the planks that don’t fit due to the wall, cut them as you go as well. We recommend saving all cut/scrap pieces until job completion, as many times they can be used in additional cut areas.Tip
If possible, it is often easiest to start at the door of the room so that the first plank can easily be slid under the door jamb. You may want/ to undercut the door jambs to accommodate the height of your new laminate flooring while helping to hide cut ends that can’t be cover by base or quarter round.
8: Install Your Baseboards, Quarter Round or Shoe Molding
Once you’re done laying your new laminate, it’s time to revert to the choice you made in step 4. If you left your baseboards on, install your quarter-rounds onto your existing baseboards. If you removed your baseboards, reinstall them or install your new ones.Tip
Remember to always measure twice so you only have to cut once and can reduce your waste amounts. Ideally, depending on the size of the job you’re completing, you always want to have some remaining full planks (or full boxes) that you can store to use as replacements later if needed – accidents happen. Also, laminates can change through dye lots and production dates, so a perfect match after the initial purchase cannot be guaranteed. So, it’s nice to have spare leftover in case you only need to replace a plank or two.
Shop Our Wide Selection of Laminate Flooring
Browse our selection of laminate flooring.
Shop Our Selection